
The Amazon Scratchpad API is really now the only way you can display Amazon product images on your site. And it’s not that hard to get used to using it (see here for our guide on switching over to API images).
But one annoying thing that can happen when you fetch and copy the HTML code from Scratchpad to embed into your website, is that the image that actually displays has a couple of annoying extra things attached to it.
First, there’s this annoying “N/A” that appears directly below the rendered product image:
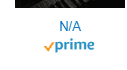
And there can also be this weird icon that looks a bit like a “Play” sign that also renders:

Most of us don’t want these extra things appearing with the product image – we want everything looking neat and tidy with just the image rendering and nothing else. How can we get rid of these extra things that appear?
If you’re rendering the API images alone, one at a time in isolation, getting rid of the “N/A” is easy. Just click next to it, and delete it like you would any other piece of text in WordPress. Do the same for the small “play” icon that appears.
This should immediately get rid of these extra things, so the letters and link disappears and just the product image appears and nothing else.
But sometimes you might be grouping images together in columns or tables, and it’s not so easy to just click and delete the “N/A”. So let’s cover the more technical way to remove this by editing the API HTML code you insert into your site.
Removing the “N/A” By Altering The HTML Code
Disclaimer – Always open up a draft page to test any alterations you make to the code of API rendered images to make sure the end result is what you want. Always make sure you have an “out” or a way to rewind any changes you’ve made and revert to what you had before if need be.
If you’re using the Amazon API images in a more complex way that means you can’t just delete the “N/A” underneath it, you’ll have to manually amend the code that you pasted into the website to display the image in the first place.
The “N/A” appears in a few places in the full strand of HTML code you’ll have copied and pasted from the Scratchpad. You just need to remove all instances of it from the code, while leaving the rest intact to make sure the image still renders.
Here’s an example I tested – I highlighted the bits I removed to get rid of the “N/A”:
When I removed the highlighted orange section plus the extra instances of “N/A” in the red boxes, it no longer displayed on the rendered image.
Here’s what you do:
- Switch back to the Text Editor in WordPress
- Remove any bits of code containing the “N/A” plus any links attached to it.
- Remove only the code that is strictly necessary and leave the rest of the code alone
- Switch back to the Visual Editor to make sure the text is gone.
The exact code you pasted from the Scratchpad for your own image may differ slightly. The main point is to remove anything that contains or is attached to any “N/A” property. But be careful when doing this and always test on a draft page first before changing the code on any actual images, especially if contained in tables/columns that can be easily messed up by changing the wrong code.
Don’t Save & Reupload Amazon Product Images
One tempting way to get around this problem is to simply screenshot the product image, edit it to crop/edit out the “N/A” or other bits you don’t want, and then save and reupload the image to your website.
This is against Amazon’s Terms of Service and it’s NOT advised to do this.
All Amazon product images must be fetched and rendered from their official API/Scratchpad tool. Saving, editing and reuploading images is not permitted and is an easy way to get kicked off the Amazon Associates program.
The reason for this is that Amazon wants all product images displayed on websites to be easily automatically updated if necessary as the product information/images change on Amazon’s own site.
Using the API tool allows this, since using the Scratchpad code automatically fetches whatever product image is on Amazon’s site at that moment and displays it on your website (it checks every 24 hours for updates). This means that if the product image changes, this will reflect automatically in the image displayed on your site, without anyone needing to do anything.
If you’re saving, editing and reuploading Amazon product images, you’re putting a static image on your website that won’t be updated if the image changes, unless you do it manually. Amazon don’t like this; they want all images to be fully up to date as they appear on their own site, and using the API tool allows this whereas saving and reuploading images doesn’t.
Therefore the only legitimate way around this “N/A” problem is to edit the code of the rendered image, either directly via the Visual Editor or via the Text Editor, to get it to display how you want. Saving and amending images isn’t a viable option; you need to always be using the API code to stay within Amazon’s rules.
