
Disclaimer – Do not use the information in this guide to behave in an abusive, invasive or otherwise illegal way on Facebook.
It can happen that we sometimes might want what’s called a “burner” or “throwaway” Facebook account – much like a burner phone, something that’s not connected to any other account we use and is just a standalone account not tied to any of our other social media profiles. We can use it occasionally or for a one-off need, and then never log in again if we don’t want to and just forget about it.
Some Facebook users like to be a “fly on the wall” in certain groups or communities – observing interactions but not participating, or just to gather news/information for research, or find old people from your past. Whatever the reasons (as long as legitimate), it is possible to create a “burner” Facebook account separate from any other accounts you have. You just have to run through a meticulous process to keep it separate from any connected accounts or emails.
Here’s the quick process:
- Activate a VPN connection if desired
- Create a fresh email account not used elsewhere
- Run through the steps to open up a new Facebook account, connecting it to your new email
Now let’s run through illustrated steps.
Step #1 – Use a VPN Connection (Optional)
This is only really if you want to be super meticulous and not even have this new account associated with your current IP address (social media platforms like Facebook log everything about users, including the IP address they log in from).
(If you’re not bothered about this, skip to step #2).
If you want to literally keep even this separate, use a free VPN to mask your real IP address and use a new one. ProtonVPN are an excellent option for this, with loads of free USA server locations with unlimited use, but there’s other free options as well (PrivadoVPN have a 10GB/month free VPN with UK and Canada servers).
Download and install a VPN and open up a new server location connection before commencing with the other steps if this is important to you.
Step #2 – Create a New Email
If you want this burner Facebook account to be totally separate from all other accounts, with no connections at all that can be made, then you need to link it to a totally new email address that you don’t use for anything else, and isn’t linked to any other social media or other accounts.
For this purpose, it’s easiest just to create a new email address from scratch. There are some good 100% free options – click on the links to go straight to the “create account” pages for Gmail and ProtonMail for two good options, but there’s more as well.
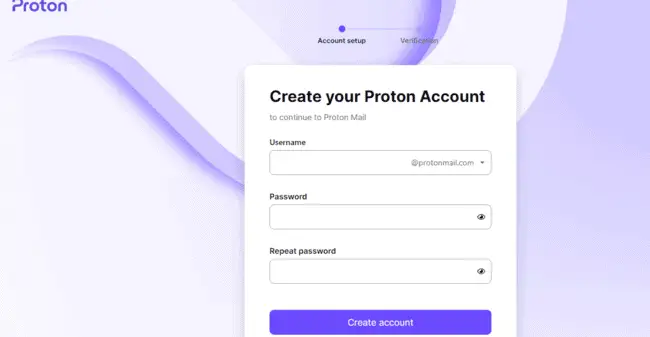
I personally prefer Protonmail, because account creation is easiest – no phone verification required as with Gmail, plus less of these annoying login verification prompts when you log into Protonmail – it’s a more privacy friendly platform.
Also be aware that with Gmail, you’re actually creating a whole new Google account, not just an email, plus text verification is often required.
Whatever option you choose, set up the email account and then keep it open as you’ll need to connect it to your new burner Facebook account and enter verification codes.
Step #3 – Set Up A New Facebook Account
Now you’ve got your “burner” email, you can set up your “burner” Facebook account and link the two together.
Click this link to go straight to the Facebook home page, select “Create Account”, and follow the steps to set up a new account, linking it to the new email you just set up.
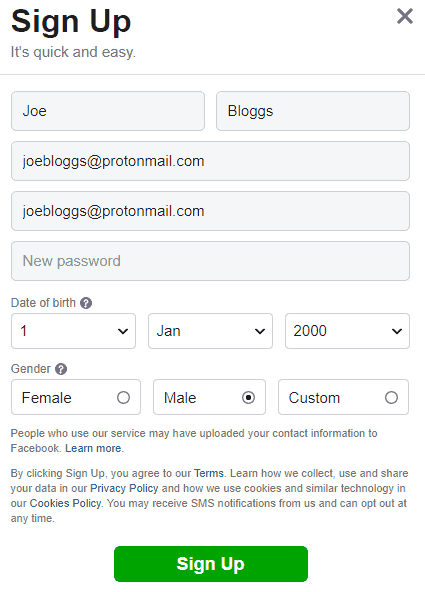
Here’s some things to note when setting up a new account:
- You need to be at least 13 years old
- You need to enter your name, gender and date of birth, plus the email address you just set up.
- Once you create your account, you need to verify by phone or by inputting a code sent to your new email.
And that’s it! You’ve got a new burner Facebook account to browse as you please which, if you followed the steps, should not be connected to any other accounts you own.